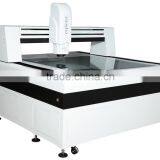
Automatic coptical machinery
USD $20,000 - $26,999 /Set
Min.Order:1 Set
Quick Details View All >
Dongguan Wang Min Optical Instrument Co., Ltd.
Product Details
Automatic coptical machinery
1. Double closed-loop motion control, motor in high-speed movement with precise positioning performance.
2. Using the embedded modules developed to control motor, increasing motor speed accordingly, but also to simplify the instrument and the PC-interface, PC machines and instruments through the USB line and S-Video cable.
3. It is coupled with the company's self-developed CNC measurement software to achieve rapid detection of large quantities of work pieces at the same time with SPC data analysis capabilities in order to achieve a one-time complete the whole measurement.
4. Surface light source formed by an independent group of 24, each group are constant current source driver and 200-step continuous variable.
5. With marble platform, high stability.
1. It can measure point, line, circle, arc and oval, rectangular and improve the accuracy with the multi-point positioning function.
Model | CNC-5040 | ||||||
| Glass table Size |
530*430 | |||||
Metal table Size | 700*600 | ||||||
Working travel X.Y | 500*400 | ||||||
Z-axis travel lift(mm) | 200 focus | ||||||
X.Y.Z-axis digital display resolution | 0.5um | ||||||
X.Y axis value error | ≤(3+L/200)L is the measured length,unit mm) | ||||||
Weight(kg) | 720 | ||||||
Dimession | 900*1050*1650 | ||||||
Motor | Three axis velocity | 100mm/s | |||||
Three axis positioning accuracy | 0.001mm | ||||||
Image system | Camare | Sony color 1/3″CCD camera | |||||
Zoom | coaxial optical zoom lens with a zoom lens (2 select one) | ||||||
Zoom magnification | 0.7-4.5X | ||||||
Video total magnification | 30-230X | ||||||
Objector field | 11.1-1.7mm | ||||||
Power | AC220V/AC110V | ||||||
Power consumption | 100W | ||||||
Insreument accessories | 1Xtube(option) | 0.5Xtube(option) | Working distance | ||||
Zoom lens | 0.7-4.5X | 0.7-4.5X |
| ||||
Add lens | Video magnification | Material side field(mm)
| Video magnification | Material side field(mm)
|
| ||
0.5X option | 11.8X-74X | 22-3.4 | 5.9X-37X | 44-6.8 | 175 | ||
Standard | 23.5X-148X | 11.1-1.7X | 11.8X-74X | 22-3.4 | 92 | ||
2Xoption | 47X-296X | 5.5-0.9 | 23.5X-148X | 11.1-1.7 | 36 | ||
2. It has many features, such as combination of measurements, center structure and the intersection of structure, the midpoint of construction, line structure, a round structure and structural point of view.
3. It is coupled with the company's self-developed CNC measurement software to achieve rapid detection of large quantities of work pieces at the same time with SPC data analysis capabilities in order to achieve a one-time complete the whole measurement.
4. Coordinate translation and coordinates straighten out is to make measurement more convenient and efficient and improve measurement efficiency.
5. Macros can measure the same parts faster and more convenient volume and improve the measurement efficiency.
6. Measurement data directly input into AutoCAD and become a full work circle; the data also can be entered in Excel and Word to conduct statistical analysis.
7. Record user program, editing and execute command.
12 months warranty. Buy with confidence!
1. Within 12 months from the date of assemble and acceptance, but not exceeding 15 months from the date if shipment.
2. During this period, we will take phone and internet teaching to users with a combinative after-sale advisory service.
3. We provide life warranty services of machine for users with cost.
01. If machine failure caused by our side, you can send back the spare parts to us and the cost by our side.
02. But if needs our technician come to customer side for training, technical service is free,except ticket and accommodation.
4. Extra warranty period: We will provide to user after-sale long-life advisory service.
5. Our company has spare parts which can be provided for the users with cost.
6. We provided users with after-sales value added technical service by preferential price for life,


Contact Supplier

You May Like


New Products
Popular Searches
Recommended Products
Find Similar Products By Category