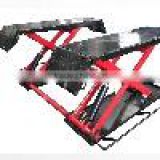
3D wheel alignment machine with CE & ISO Certificate
Negotiable /Set
Min.Order:1 Set
Quick Details View All >
Shanghai Fanyi International Trading Co., Ltd.
Product Details
Specifications
3D Wheel Alignment machine
competitive price, good warranty service, fast delivery.
Technical features |
|
|
|
|
|
Measuring unit: | 2 group of industrial camera (take photo)+four target panel(reflect image) +special software |
| * quick search the vehicle model as per letter order, manufacturer, model and produce year. | ||
Measurement methods: |
| Operate:* obvious and dynamic interface, with picture and essay, which will guide the operator, and make the operation easier. | |||
* push the vehicle: push the vehicle forward and rearward 12-18cm (or 30-40o) to complete the measurement and eccentricity compensation. |
| ||||
*rotate the wheel: lift the vehicle up to the height of the wheel leave the ground and rotate the wheel 30-40o to complete the measurement. |
| * the operation video is available to be loaded and instruct the operator to use correctly. | |||
Push vehicle indication: * direction: push the vehicle as per the arrow indication. |
| * the 3D animation of adjusting and the real vehicle adjusting video is available to be loaded to be the reference to the operator. | |||
* distance:indicate the push distance through the timely changing data show on the screen |
| ||||
status: indicate the operator that the measurement is completed through the animation “Stop” and the word “complete pushing vehicle” |
| * the quick measurement could be carried out by shortcut menu. | |||
Installation distance: * the distance between the camera and the distance of the target panel center allowed to be in the arrange of 2.450mm-2.750mm. |
| * with the function of the independent menu of diagnosis and maintenance, assure the using efficiency of the equipment. | |||
Rim diameter: | *suitable for the wheel of 13”-22” |
| * the quick measurement could be carried out by shortcut menu. | ||
Target searching: |
|
|
| ||
*search the target panel through adjusting the height of the camera manually. |
| Stability: the optical sensors were replaced by advanced technology and mature spare parts, therefore, the stability of 3D wheel alignment will not be affected and interfered by electricity, circuit, strong light, temperature, battery and voltage. | |||
| |||||
Bitmap
|
| ||||
Database: |
|
|
| ||
*25000 vehicle data covering most majority of the main vehicle model around the world. |
| Reliability: compare the measurement principle, laser is point, CCD is line, 3D is side, measurement result of 3D is much more reliable. | |||
| |||||
*vehicle data update is synchro with Autodata, which is complete, correct and reliable. |
| ||||
| Function: effectively measure front and rear toe, camber and camber difference, KPI, caster, set-back, and thrust line angle. | ||||
* display the data with the unit of degree, degree and minute, inch, mm. |
| ||||
| |||||
Technical parameters |
| Package size |
| ||
Item | Range | Accuracy |
| Cabinet: 1030mmx790mmx1030mm | |
Total toe | ±20° | ±0.02° |
| Spare parts: 1180x790mmx780mm | |
Individual Toe | ±10° | ±0.02° |
| Beam:1180mmx790mmx780mm | |
Camber | ±12° | ±0.02° |
| (L × H × W) |
|
Caster | ±20° | ±0.05° |
|
|
|
KPI | ±25° | ±0.05° |
|
|
|
Setback | ±10° | ±0.01° |
|
|
|
Thrust Angle | ±10° | ±0.01° |
|
|
|
Pwer supply | 110/220V, ±10V,50Hz, ±1Hz |
|
| ||
must be grounding. |
|
| |||
Contact Supplier

You May Like
New Products
Popular Searches
Recommended Products
Find Similar Products By Category